


IEP-SST-504 Module Transfers
10 Steps to develop an SST Plan
- Click on the Choose Student icon to get your student list; click on student name to go to SST Manager. Let your SST Coordinator staff know if any of your students do not appear or if you see any students on your list that are not yours.

- Active Students who are undergoing an active SST Meeting or Followup meeting will be "Active" Students who have completed the SST Process will be "Inactive". If the student needs to pick up on a new SST referral, just by starting the new SST meeting will make the record 'Active'.
- If the student does not exist in the SST Module, you will need to create a new Student Record by going to the Student Info menu, then select + New Student. Do not create a duplicate if the student already exists; instead transfer the record to the SST Module. Note, the student will need to be 'Inactive' before transferring.
- Go to Student Info/Student Profile to check accuracy of information that will go directly onto SST forms. Add missing data into the Student Profile and it will appear on the forms you plan to develop.
- Personal Demographics: ethnicity, race, EL type
- Contacts: must at least have one primary contact
- Medical: Vision/Hearing results, Medications, and Overall health data. You can enter data for your entire caseload when you get report from nurse. Move quickly from student to student using the green arrows below the SIRAS logo. Lists/reports can be created once this information is in SIRAS.
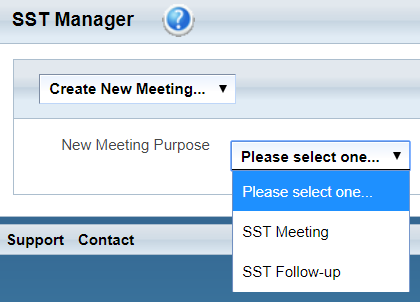
- Select Meeting Purpose on SST Manager to get all forms associated with that meeting type.
- Enter meeting date, time, and location, if known. You may enter this information at any time.
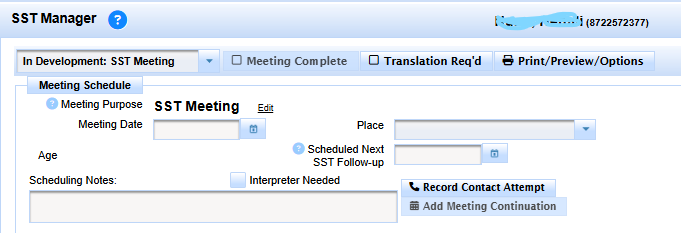
- SST Manager Tabs: Basic forms (SST forms); Pre-Meeting forms; Other forms, Upload Documents and Notes from General Ed. If the parents require Pre-Meeting forms in Spanish. First, complete the form in English and then click the Show Spanish Forms button to develop the page in Spanish.

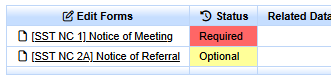
- Pre-Meeting tab contains the forms used prior to the meeting such as the Meeting Notice or Notice of Referral.
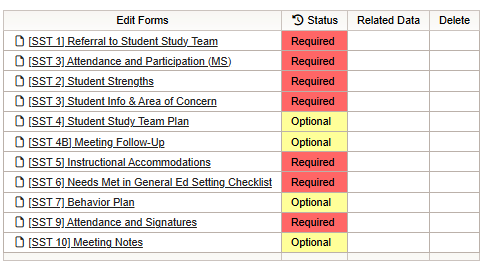
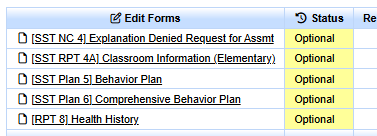
- Basic Forms tab opens as the default and contains all the forms that are used at the time of the actual meeting. Once all the required forms have been submitted click the Preview/Print/Options link to assemble the SST. The forms and if they are required or optional are dependent on your district’s preference.
- Other forms tab contains other forms that may be necessary for the SST meeting but is not a numbered page in the SST such as the Health History, Classroom information or Parent Interview forms.
- Uploaded Documents tab is used to upload any document associated with the meeting such as doctor’s notes or an evaluation from an outside source, etc. If the form is uploaded as a PDF document, it can be appended at the end as a numbered form with the SST. Click the blue question mark button located in the lower left corner for more details. DO NOT enter periods in the file name of an uploaded form.
- General Ed Report tab allows the SST Coordinator to request from the general education teacher(s) information about the student in advance of the meeting date. This is done by emailing a SIRAS generated link to the general education teacher. When the general education teacher clicks on the link SIRAS will open a screen where the general ed teacher can enter commentary about the student of concern. This email link can be sent to any staff, specialist, or parent from whom you wish to request information. This commentary is collected by SIRAS and all combined into one comprehensive general education summary report. Click General Ed Summary Report Help page for more information.

- All required forms must be submitted before the SST can be assembled under the Preview/Print/Option button.

- When in the SST Manager in a SST form, at the top of the form click Save
 (which simply saves the information and keeps you on the same page) or click the "Save and return…”
  (which saves the information and takes you to the location that you select from the menu). The menu defaults to "SST Manager" but this feature allows you to bypass the SST Manager and go directly to the next SST page that you want to access.
- Fill out all required (red) forms and desired (optional) forms for meeting. A green check mark
 will appear on all forms you have opened and saved. This does not mean you have successfully completed them, just that they have been opened and saved. All ‘Required’ forms must be addressed.
 - Use the ‘Preview/Print/options’ button on the SST Manager to preview the submitted SST forms for the meeting. The PDF will be paginated. It is recommended that if there are orange form warnings, go back to the SST Manager and correct.
- If you are using a computer during the meeting, you may wish to bring drafts for team members to look at unless you will be projecting the SST pages onto a screen. In either case, you can make any corrections or changes directly onto the forms. The parent or staff can sign the e-signature lines on the computer or send the form via email using the email form link. At the close of the meeting, use ‘Preview/Print/Options’ to print out a paginated copy for the team to sign.

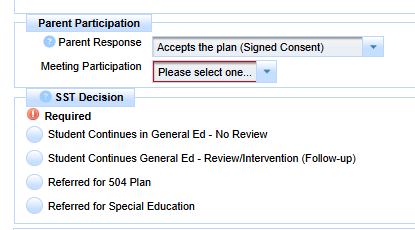
8) Click on “Meeting Complete” checkbox. That will push all the important data for the completed SST over onto the MIS Summary page. If you made any handwritten changes on the printed copy during the meeting, go back into the forms on the computer and enter the information so the electronic and printed copies of the SST are the same. ![]() You will get a popup menu which you will need to indicate the Parent’s Response and Meeting Participation. Select “Accepts the Plan” for Parent Response.
You will get a popup menu which you will need to indicate the Parent’s Response and Meeting Participation. Select “Accepts the Plan” for Parent Response.
9) SST Decision – This is the most important part of the SST Meeting, the decision of the team at the end of the meeting.
-
- Student Continues in General Ed – No Review
Use this option if no further follow up is needed, i.e. lack of attendance, student needs to come to school. Instead of Continuation meeting, select a SST Follow-up meeting after meeting is Finalized (Continuation meetings are rarely needed for SST). The text from the forms in the previous SST will populate in the SST Follow-up meeting forms. The Student Status will auto change to ‘Inactive’. - Student Continues General Ed – Review/Intervention (Follow-up)
- Student Continues in General Ed – No Review
When selecting this option it is expected the accommodations are being suggested to the General Ed teacher and that the SST Team will follow up on how effective the accommodations are after a period of time. A SST Follow-up Date will be required with this option and the Student Status will remain ‘Active.
-
- Referred for 504 Plan
This option will temporarily transfer the record to the 504 Modules and set up the record status as Pending for a 504 Referral. If the student becomes eligible for a 504 Plan, the record will remain in that module; if the student is not eligible for a 504 Plan, the record will get transferred back to the SST Module as Active.
-
- Referred for Special Education
This option will temporarily transfer the record to the Special Ed Modules and set up the record status as Pending for a IEP Referral. If the student becomes eligible for a Special Education, the record will remain in that module; if the student is not eligible for special education, the record will get transferred back to the SST Module as Active.
- Upload any support documents in the Uploaded Documents tab.

- Proofread the SST carefully to be sure all corrections were made. If anything was missed, you can still make changes on the form and reprint that page if needed.
- Signing SST Forms:
Forms can be signed 3 ways:
- Print out form, sign, scan and upload under the Upload Document tab.
- If a touch pad or use mouse to sign on the computer generated form on the e-signature line.
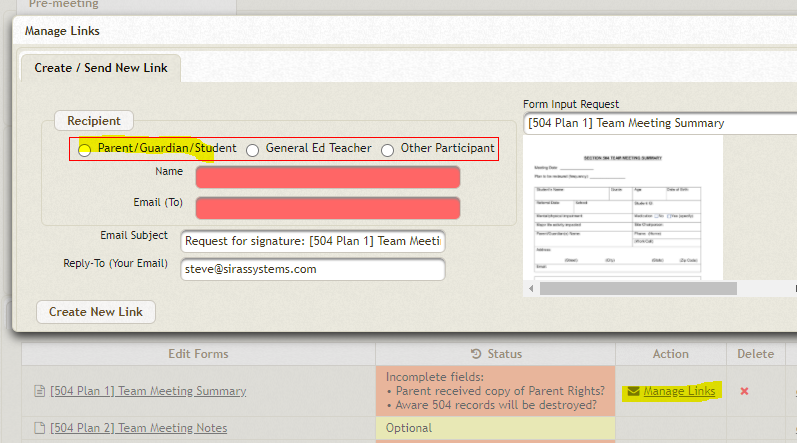
- Use the Manage Link to send the form via email form link and to sign the form e-Signature line.
- Manage Link – Sending form to parent to sign if not in physical attendance. Click here for more information
- Check any notes you have put in the Scheduling Notes box on the SST Manager to be sure they reflect the comments you want to remain on record after the meeting has been finalized. Delete any working notes or resolved issues. Enter any other information pertinent to the meeting outcome (e.g. "Meeting finalized even though parents did not sign; additional assessment to be conducted before scheduling another meeting.")

Use the Record Contact Attempt button to log your attempts contact parents and staff.![]()
Also, if there is a need to continue the same meeting (short time) use the Add Meeting Continuation button![]()
10) Click on ‘Finalize’ to lock the forms so no further changes can be made. ![]() This will conclude the SST Meeting.
This will conclude the SST Meeting.
![]() Will be located upper right corner of SIRAS.
Will be located upper right corner of SIRAS.
SIRAS Support
Contact SIRAS Support with any question you may have.
Phone: 1 (844) 33 SIRAS
Email: [email protected]

