


BULK PROGRESS REPORT
SIRAS Provides the option to do individual Progress Reports [Student Info/Data Collection and Progress Report], or to do multiple progress reports by using the Bulk Progress Report [Reporting /Bulk Progress Reports]. To learn more about how to operate the individual Progress Report go the individual Progress Report area to learn more about how to operate the individual Progress Report go the individual Progress Report area and click the blue question mark button in the upper left corner.
After you select the Bulk Progress Reports it will search for all records that may be eligible for a progress report (Active with completed goals). This query may take a little under a minute to complete. You will see a new found set of all the eligible records.
If you scroll down the page you will see what SIRAS believes are the progress reports that need to be completed. Sometimes you may see records that you may not have the responsibility or in processes of an initial. These can be eliminated by omitting them from the list. To do this first check the checkbox next to the names of all the records that you DO NOT want on the 'need progress report list'. Then on the last record you check, click on the '>' next to the checkbox which will open a popup menu. Select "Omit marked".

1. Once you have the desired set of records, start at the top (first record on the list).

2. Enter "Date Report Sent". This date is per record as the progress reports dates may not fall on all records at the same date.
- Goals: When you click on "Add Progress Report" the date from the first "Date Report Sent" will appear in the first progress report (you must enter the "Date Report Sent" before creating the progress report).
Last Progress Report - after all progress reports have been addressed, under the 'Action' column enter if goal was met (Yes/No). If "No" you will be given the option to 'keep and revise' which will allow you to continue the same goal after revised to ensure success. You will need to edit the revision of the goal in the Goal Developer. When the goals have been 'Archived and Advanced' a copy of the original goal with the progress reports will be placed in the Archives Goal tab while a copy of goal (which will need to be revised) will remain in the Current Goal tab.
- Benchmarks: You would report on one benchmark per reporting period. When you click on "Add Progress" to the right of the benchmark the first "Date Report Sent" will appear in the first progress report (you must enter the "Date Report Sent" before creating the progress report).
Last Progress Report - after all progress reports have been addressed, under the last benchmark select "Add Final Progress". If "No" in the action column you will be given the option to 'keep and revise' which will allow you to continue the same goal after revised to ensure success. You will need to edit the revision of the goal in the Goal Developer. When the goals have been 'Archived and Advanced' a copy of the original goal with the progress reports will be placed in the Archives Goal tab while a copy of goal (which will need to be revised) will remain in the Current Goal tab.
3. Grading Period - This is a global field that will remain during the duration of your session. So you only need to enter it once and it appear on the other records automatically. Then select the grading period for the report from the menu (quarter, semester, trimester).
4. Progress Report Date - The date defaults to the date selected for the Progress Report to be sent home. If the report date needs to be changed, it should be corrected using the calendar at the top of the page.
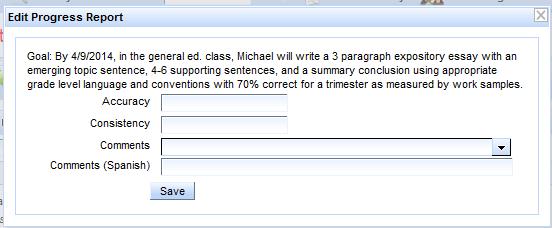
5. Accuracy - Enter the current level of Accuracy the student has achieved. The accuracy must be expressed in the same terms as used in the goal or benchmark (number of times, errors, prompts, percentage, etc.). This is a report of how well the student is performing at this time.
6. Consistency - Enter the current level of Consistency that the student is able to achieve the reported level of accuracy. The consistency must be reported in the same terms as used in the goal or benchmark (number of weeks, trials, observations, etc.). This is a report of how often the reported level of accuracy was demonstrated.
Optional:
Comments - Comments do not substitute for Accuracy and Consistency. They should serve as an explanation and/or summary of the reports of the levels of Accuracy and Consistency. For convenience a menu of comments is available in the comments box. This menu can be bypassed by clicking directly into the box to access the field so you can type in your own comments. The box looks small, but it will expand to whatever size needed to enter your comments. Below the English Comment box, there is also a box for a comment in Spanish. If you selected a comment from the menu it will automatically be translated into Spanish; however, if you added on to the comment in the menu the connection to the Spanish translation will be broken, and the entire comment will need to be translated. Any comments not selected from the menu will also need to be translated.
Note: If a goal is added after the first progress reporting period, it will be necessary to enter a "report" for each date already reported to get to the current report date. It is suggested that the user open each of the previous report dates and simply enter a comment "Goal added on date" to indicate why there were no reports for the previous reporting periods.
This process should be repeated at each scheduled reporting date. When doing the final Progress Report for the IEP meeting, you must also indicate whether each goal was met (under Action). Once you do this, you will see the word "Clear" appear. That feature will allow you to remove the "Yes" or "No" (in case you did this by accident before the final reporting period). This is important because when you mark "Yes" a green check mark and the words "Goal Met" will appear on the Progress Report. When you check "No" a red circle with an exclamation point and the words "Goal Not Met" will appear on the Progress Report to remind you that you need to address this area of need in the next IEP.
If you check "No," you will also be given a choice as to whether or not you wish to "Keep/Revise" the goal for the next IEP. You may mark that on the Progress Report screen or in the Goals Developer when you are working on new goals. Note, if you elect to "Keep/Revise" a goal, then it will not be archived in the system and you will not have an archived record of the student's progress toward that goal. For this reason, it is recommended that you archive all goals and write a new goal to replace the one that was not met. You need to go to the Goals Developer to Archive and Advance goals. Once you archive a goal, the progress reports for that goal will also be archived.
If you notice any blank goals and/or goals with errors (lines with empty ___ or XXX), you need to go back to the IEP Manager/Goals Developer to correct these mistakes.
There is also a box at the bottom (below the goals) called "Overall Comments" where you can enter other information regarding the student's progress. Information entered in this box will print at the bottom of the actual Progress Report and will be saved for the next reporting time. For this reason, it is suggested that you date your comments so you can add on to them at the next reporting time. The Spanish Progress Report also has a box for overall comments which will need to be translated from the English version of the Progress Report.
Before you print your Progress Report(s) from either screen, you will need to be sure that your pop-up blockers are turned off. Progress Reports are in HTML which is a different format than the IEP forms. These forms are much more flexible and can "grow" to fit any amount of information needed for the comments section as well as the number of goals and/or goals and objectives you developed; however these forms require the extra step of turning off the pop-up blockers on your computer.
When you click on Print, the program will open a new window (or sometimes a new tab, depending on the computer) for you to view and complete the Progress Report. You may also enter additional overall comments at the bottom of the page before printing. You can also "preview" the report before printing by going under the File menu in your browser to Print Preview. When you have finished printing the Progress Report(s), close the new window or tab to get back where you were in the program.
To print click the "Print All Progress Report" button located in the upper right corner. If the Progress Report is needed in Spanish and if you used the GoalWizard and "polished" the translations click the (Spanish) link.

See document on Printing in SIRAS for more detailed information.


