Using the Search Feature in SIRAS
For a general guide to using Choose Student and the Found Set, read navigating through SIRAS.
Found Set and Choose Student
On the top left of every page is the Choose Student link which contains the count of records in the current Found Set.
Clicking this will open the Choose Student dialog.

To the right of the magnifying glass icon is the Quick Search.

To search for a specific student in SIRAS, you can type the following into the Quick Search:
- First and last initials
- First two initials of first and last name
- Student or Local SIS ID
- SSID
- Birthdate
Then click on the arrow to the right of that box or hit the 'Enter/Return' key.
If you are not sure of the students exact name or ID number, you may enter only part of the name, and the program will bring up all students containing that entry (see below).
Once you have done a search, the number of records in the Found Setwill be reduced, and the words Modify/Reset Search will appear next to the hourglass.
To bring back all records, click on Reset Search (highlighted yellow).
For more advanced queries click the blue magnifying glass which opens the Query Builder. If you know the name of the field that you are looking for, enter a few letters of that field to the right of the 'Add Criteria' then select the desired field to search in the menu. If you are not sure what the name of the field you want to search, click the '+ Add Criteria' button. You will see a menu divided in categories. Click the Category that you are interested in and then the specific field you want to query.

Enter or select what you are searching for. To Execute the search click one of the buttons up top: Choose Student will open the student selection dialog, or Search to List will take you to the Student Lists area.

To get back to the query builder to change the query, click the 'Modify' button where the Search button used to be.
![]()
Search Query Builder
Click into the Add criteria window, where you see the faint text: type field name..
You can select from the large list of fields, or simply start typing the name of the field you want to search by and then select from the filtered menu.

Checking "Exclude" will apply the inverse of the criteria (e.g. NOT(Grade = Preschool)). Selecting 'And/Or' will group criteria with adjacent ORs to allow for boolean logic queries. There is no limit to the number of search criteria that can be added, and any combination of fields is permitted. It can sometimes be helpful to put in one criteria to include and another one to exclude as a means of getting the desired group of students.

In some cases you will be given the opportunity to further define your selection. For example, if you select the option of grade you will have the choices of equal to the grade you enter, between two grades, or greater than or less than the grade selected.

Similar choices are available for age, dates, and other fields where you may want a range of selections. If you select Between you will get 2 fields that allow you to enter a begin and end for the range you desire. (Between is inclusive of the boundaries.) For date fields you will also have a calendar from which you can select the dates desired.

Additional Query Features
Predefined Queries
There are many queries that are commonly used. In the Predefined Query tab, select the category the select the desired preset searches.
Additional Help for Predefined Queries and Lists
Saved Queries
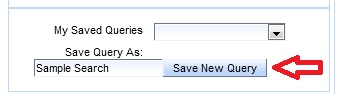
1. Create the query you want to save and execute the search.
2. Enter the name you want to call the query below and click 'save new query'.
3. Next time you want to execute that saved query, click on the 'Saved Queries' tab. Then below select the saved query from the popup menu, then at the top choose either Choose Student or Search to List to execute.

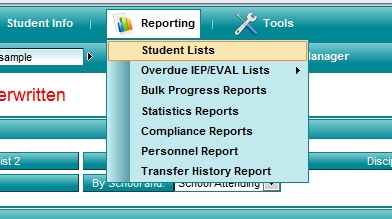
Once the search criteria have been identified, the user needs to go back to the top of the Search screen and click on one of the two choices next to the number of records to be searched: 'Search and Choose' or 'Search to List'. Search and Choose will bring you to the Choose Student screen (as shown in the second screen shot in this document). Search to List will take you to the default Management List (also accessed under Reporting/Student Lists/Management List (default) .
Anytime you create a search that you think you might use again, you can save time in the future by saving the list. Simply type in the name you want to assign to that query next to Save Query As, and then click on Save New Query. Your query will then appear under the Menu next to My Saved Queries so you can select it again any time you need it.
Removing or deleting saved query
After a query is saved, if it needs to be removed, the saved query can be deleted by loading them, then using the 'Delete' button seen on the right hand side
Custom List and Queries Sharing Feature
SIRAS has the ability for Admin Users to share custom lists and queries to others within a SELPA, district, or school. A custom list can also be associated with a query. Saved Queries are found within the Search panel while Custom Lists are within the Student List editor. Once a query or list is saved, the option to share will appear. If you have run a Saved Query there will additionally be the option to associate a List with that Query. All users who are assigned to schools or districts at or underneath the shared scope will be able to access the shared queries via a dropdown in the same location.
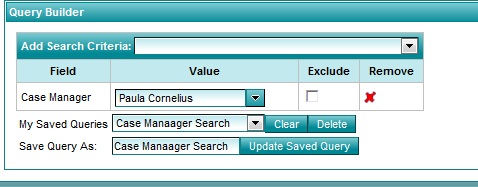
Some users serve students for whom they are not the case manager. As a means of quickly finding only the students for whom they are the case manager, they can create a search to locate the students on their case management list by entering the search criteria of Case Manager, selecting their own name from the case manager list, and then clicking on either Search and Choose or Search to List to pull up only the students for whom they are the case manager. Saving that query will enable them to quickly locate these students by selecting that search from the list of saved queries.
A saved query can be brought up at any time, and the user only needs to click on Search and Choose or Search to List to find those students again. The search will automatically include any new students who have been added that meet the search criteria.
Once a query has been created and/or saved, it is possible to modify the search criteria without having to reset the search. If, for example, a user has more than one school, the user could create a query to find the School Attending, with the name of one of the schools. The user could first search for the students in that school, and work with them. Then s/he could click on Modify and simply change the school name, and the program would switch to the new school without the user having to Reset the search. This can be very helpful in terms of saving time when the user wants to change back and forth between two or more values for the selected Search Criteria (grade, age, EL type, school, case manager, etc.)

Searching for student who meet specific criteria is a useful tool for data managment. Any time a user wants to find a particular group of students, English Learners for example, s/he can do a search limit the records viewed to only the students who meet the criteria of interest (EL type = EL). Using the search feature also makes the Student Lists (under Reporting) much more powerful. For example, instead of seeing all students in the school or district on the SBAC Participation List, the user could first search for students between grades 2 and 11 to see only the students who fall within the grades that make up the testing group for SBAC.
Advanced/Historical Queries
See Help documentation for Historical Queries
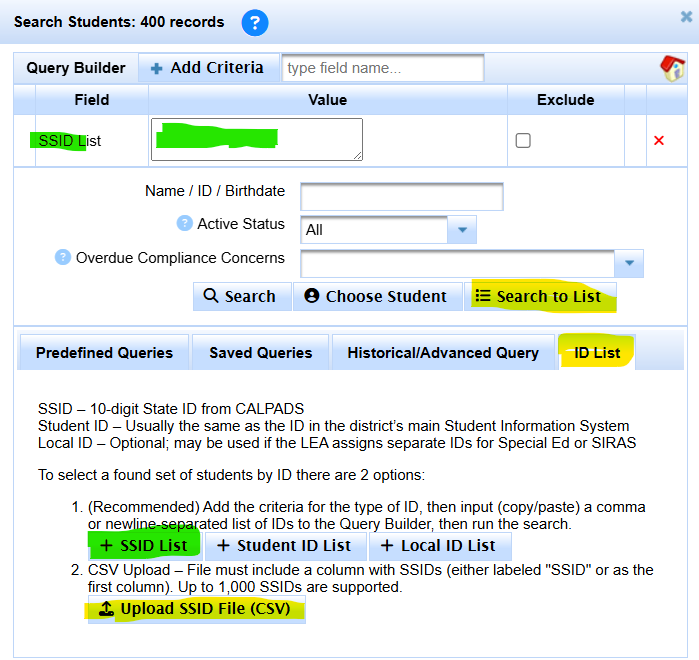
SSID or Student ID List
Click on Search ![]()
Click on the 'ID List' tab
Click on SSID list or Student ID list
Paste your list of IDs into the search box
Click Search To List